
Over the past few months, I have been the user of a
Plustek OpticBook 3600 loaner device for review purposes. The kind folks at Plustek allowed me to use the scanner for a longer period of time so I could get a good feel for what it's really like, instead of just a first impression, and now I am passing that benefit on to each of you.
So why would anyone be interested in a book scanner anyway? The obvious reason is to convert paper books that you would like to store and/or read in electronic form. While there are limits due to copyright law, it is amazing how many books and materials are worthy of conversion that are either personally owned, or in the public domain. And a surprising side benefit of having a scanner around is that it is also very useful for general document scanning. It can be convenient for creating an electronic version of paper documents for record keeping or archiving. Common targets include photo scans, receipts, handwritten notes and many more of the multitude of paper documents that surround us. And it is obviously also capable of being used to make paper copies in conjunction with your computer's printer.
We will focus on the real life experience when using this product right out of the box, as opposed to a sterile analysis of the specifications. I'll leave it to our readers to do any dissection of the specs. Instead, for this review you'll see what it actually takes to set it up, and what it's like to scan a book with it. That sort of hands on information that much harder to come by, and is probably non-existent on the web for this scanner until today. I should also indicate that I am approaching this as a scanning novice. I do not currently own a scanner, and while I have scanned paper documents at times in the past, scanning a book was an entirely new experience for me. Most potential buyers who are considering such a purchase will probably find themselves in a similar circumstance.
But before we move on, we will satisfy the primal thirst for specs, with this fairly comprehensive list:
* USB 2.0
* Color CCD image sensor
* Hardware Resolution = 1200 dpi
* Interpolated Resolution = 24000 dpi
* Scanning Modes
- Color: 48-bit input, 24/48-bit output
- Grayscale: 16-bit input, 8/16-bit output
- B/W: 1-bit
* Max. Flatbed Scanning area
- 216 x 297 mm (8.5" x 11.69", A4/ Letter Size)
* Hardware Action Buttons
* Net Weight Approx. 3900g / 8.5 lbs (scanner only)
* Dimensions(D x W x H) = 453 x 285 x 105 mm (18 x 11 x 4 inches)
* Scan Mode is Single Pass
* Lamp is Cold Cathode
* Power Consumption: 18W (operation), 4.3W (idle)
* Cable Length: 150 cm (59.06")
* System Requirements:
- IBM Compatible PC, with Pentium II or faster CPU
- CD-ROM Driver
- One available USB Port
- 128 MB RAM (256MB recommended)
- 500 MB free HDD space
- High Color graphic card (VGA or higher)
- Microsoft Windows XP, 2000
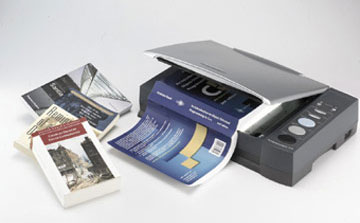
The OpticBook 3600 is one of a handful of scanners that stands out in the marketplace for fast and simple book scanning at a reasonable price (e.g. currently $299.99 at
TigerDirect which is one of many retailers listed on the Plustek web site.) This product's "claim to fame" is the ability to scan all the way to the edge of the scanning area, which allows you to easily scan a flat book page without pressing the spine down hard onto the glass as with a typical flatbed scanner. It is described in the product description as "Plustek's patent pending SEE (Shadow Elimination Element) Technology includes a specially designed edge and lamp. This revolutionary technology allows half of the book to lay completely flat on the glass with the binding against the corner edge."
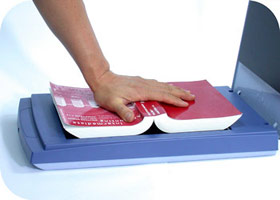
One big advantage of edge scanning is that older books can be scanned without damaging the book in the process. This is something that I tested for myself with an old book that is already falling apart, and I would not have been able to safely scan it with a standard flatbed scanner. A much more expensive overhead scanning setup would have been required. You can see how a book can be scanned using this edge scan technology
in contrast to pushing the book down to get a decent scan near the spine.
I should also warn you that we will be taking this review step by step in detail. So for those of you that are looking for the summary results, feel free to scan the screenshots and wait for the a later installment of the review with the summary conclusion. But if you want to see more detail, you can get a feel for the full experience by following along with the journey as I unpack, setup and use the scanner to scan books.
Arrival
As you might expect, I was quite eager to get my hands on the scanner. And most of all, I wanted to get a feel for whether book scanning was even practical with a relatively inexpensive device. We'll consider that in time, but first the impressions when it first arrived.
The box is quite nice, and was smaller than I expected. I was encouraged even before opening it up, but when I unpacked the unit, it was a pleasing size and style which could reasonably be placed on a table or desk without looking too bulky. But if you have a small desk, you will want to consider putting it on another surface like a half-size file cabinet. The scanner has a solid look to it, but has the typical light plastic feel when handled. It seems sturdy enough, so in general appearance, I'd give it a B+. It appears plenty good for most situations.
When you place the unit on a flat surface, the first thing you notice is that it doesn't sit flat because of the locking mechanism on the bottom, which is convenient because in that location you are not likely to miss it. The lock is used during shipping to make sure that fragile parts don't swing around dangerously while it is being handled. So before you connect it and turn it on, you should unlock it. The instructions are a little confusing at first, but basically you want to release the lock in such a way as to let it operate when at rest, but still automatically lock if the unit is lifted up from the table or desk. Alternately, you can either put the lock in a fixed position so that it is always either unlocked or always locked, e.g. for use on a very rough surface or for transport.
Box Contents
Included in the box was the scanner, a USB cable, an AC adapter, and two CD-ROMs with setup and applications. Also included is a folded up poster sized set of instructions in about 5 languages. It doesn't take a lot of information to get going.
CD #1 has:
* Plustek Scanning Software (Driver, OpticTWAIN, Action Express, Book Pilot)
* Ulead Photo Explorer 8.0 SE Basic
* Abbyy FineReader 5.0 Sprint OCR
* NewSoft Presto PageManager 6.0
* Something writtin in Japanese or Chinese that I couldn't read
* Adobe Reader
* Electronic User's Guide
CD2 has:
* Ulead PhotoImpact XL SE
I was relieved to find that there were no fancy attachments to learn how to use. I figure the main effort for setup (once you figured out how the lock works) is simply installing the software. The hardware is just a matter of plugging in the cable and adapter. The instructions seem to indicate that you can use a USB hub that is plugged into the computer, but my available port closest to the scanner was directly into the computer, so thats what I used. I also used my own cable because the supplied cable was pretty short.
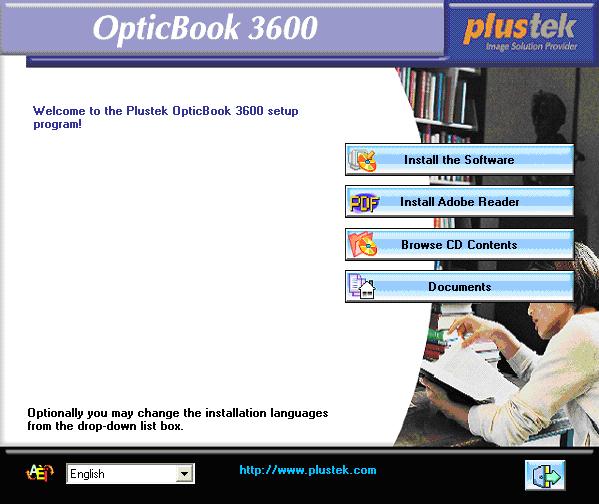
Software Installation
With XP, you turn on the scanner (which launches the New Hardware Wizard) and then put the first CD in the computer. The power switch is a rocker switch on the right hand side near the bottom and towards the back. The Wizard popped up as expected, and I chose Install the Software Automatically as per the XP instructions. Well, actually I had to respond No, not this time to the prompt about using Windows Update to search for software.
I was a little concerned when a Found no scanner dialog box came up, but it disappeared a bit later all on its own. The computer also froze temporarily, causing me a little concern, but that also passed quickly. The new hardware wizard reported that it finished installing the software for OpticBook 3600, so I was happy. I hit Finish on that wizard and felt like I had accomplished something. So far so good.
Installation continues with the other software. The main screen for that installation was already conveniently waiting for me to proceed. The instruction sheet said to follow my nose (my paraphrase) until done and then reset. So I did, and here's how it went...
First I clicked Install the Software.
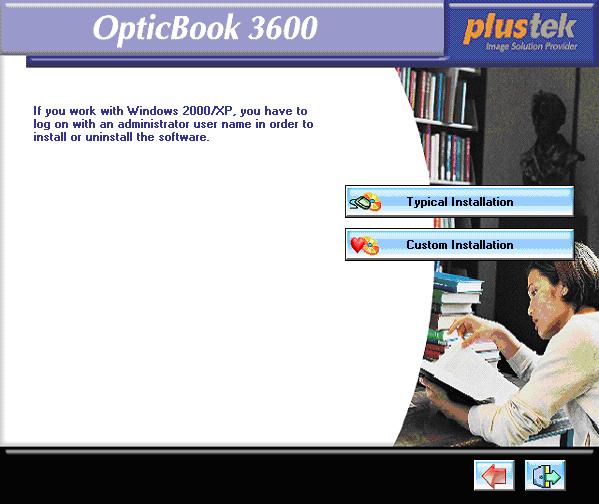
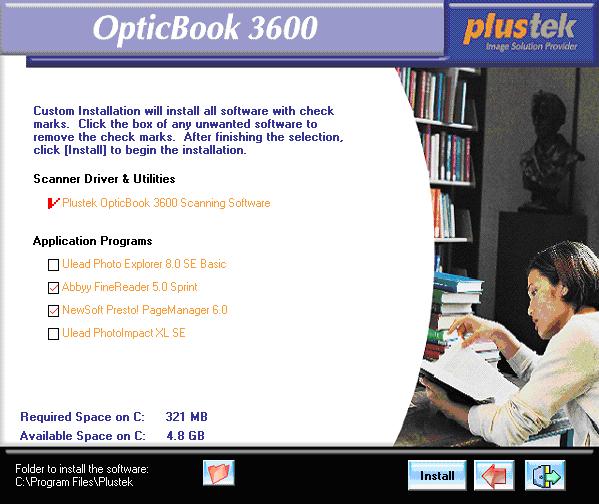
Personally, I hate all the excess software that comes with cameras or scanners or other gadgets, and its not always even clear which are trial versions. So I decided to go with a custom install, figuring that I could add more applications later if I missed one.
Turns out that all four programs is not unreasonable, so I probably would have saved myself some trouble if I had just done a typical install instead of doing a non-complete install. The programs to choose from were described by PlusTek as follows:
Ulead Photo Explorer -- Useful Image management software to quickly browse, organize, or enhance images. Create slideshows to share on CD, publish to the web, or a VCD. (I dont think I need this for simple book scanning and OCR, so it will get skipped.)
Abbyy FineReader -- High Accuracy OCR software featuring 14 language user interface and 176 language recognition. (This is what does the OCR, so I want this for sure.)
NewSoft Presto PageManager -- Powerful document management software for OCR, PDF creation, or format conversion to Microsoft Word or Excel. (Looks like Ill need this, so its in.)
Ulead PhotoImpact -- Powerful image editing software featuring extensive editing tools for working with digital photos, creative graphic e-design, and easy web page creation. (Maybe interesting, but doesnt look like I need it now, so it's out.)
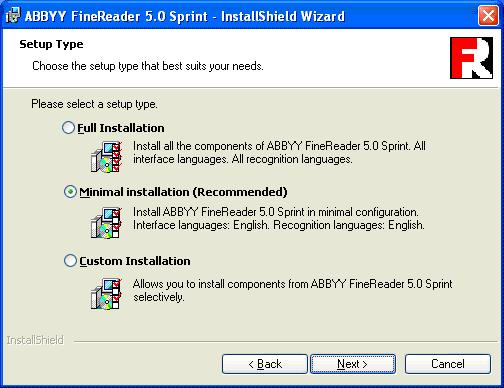
When I got to Abbyy FineReader, of course I chose English only because I only plan to scan English books.
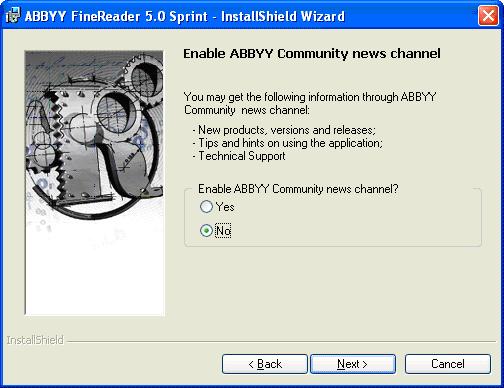
Abbyy FineReader installation also came up with this next screen that I wanted no part of, so I changed the default to a No. It might be something I want, but Im pretty gunshy about blanket permissions for stuff like that, so Ill just have to miss out on the fun.
PageManager was installed next. No surprises.
So the whole install process can be done for a novice in about a half hour. That includes all the wasted time figuring out what to do and reading the instruction steps to make sure you arent messing anything up.
All in all, Id say it couldnt be simpler, and it gives me a lot of confidence going forward. But the real challenge comes later - how hard is it to scan and OCR, and does it even work? Now to the fun part!
Scanning My First Book!
For my first attempt at scanning a book, I tried Orbitsville, by Bob Shaw. Actually, I specifically bought the used book for this purpose as it seems to be out of print and its a book that I wouldnt mind reading anyway. In addition, its a relatively ordinary oversized paperbook with not too many pages (187 in my edition). Back to the instruction sheet, this time on the reverse side.
Step #1 of scanning a book is preparation: Put the book on the glass, click on the Book function button on the scanner (to choose Book mode rather than Paper mode), and click on the Book Pilot button on the scanner to launch the Book Pilot software window. Making a guess at how the pages would be oriented even and odd, I set the cover down as if I would be scanning an odd page in the book with the binding on the edge. A nice touch is that the image is previewed automatically. Oddly enough, when the Book Pilot window opened up, it told me to wait for the scanner to warm up. I'm guessing that has something to do with the lamp, but I'm not sure.
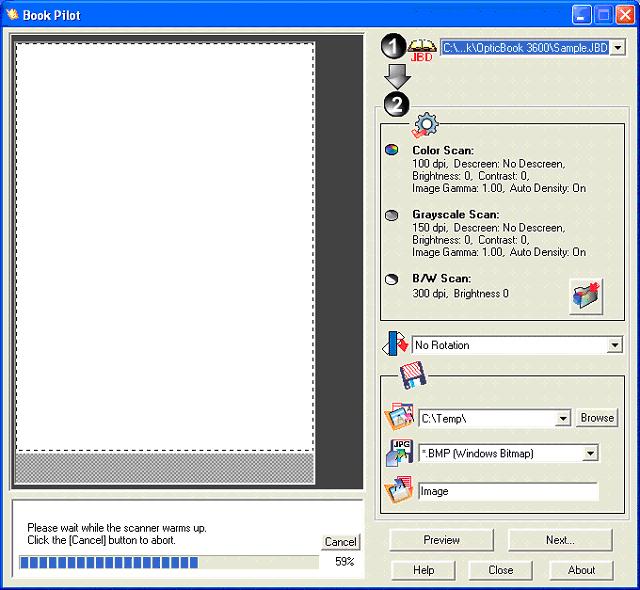
After the progress bar finished, indicating that the scanner was warmed up, I saw the preview window.
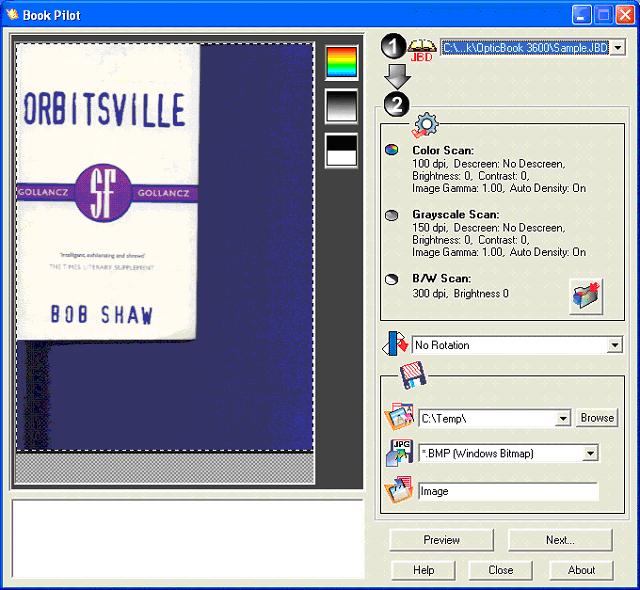
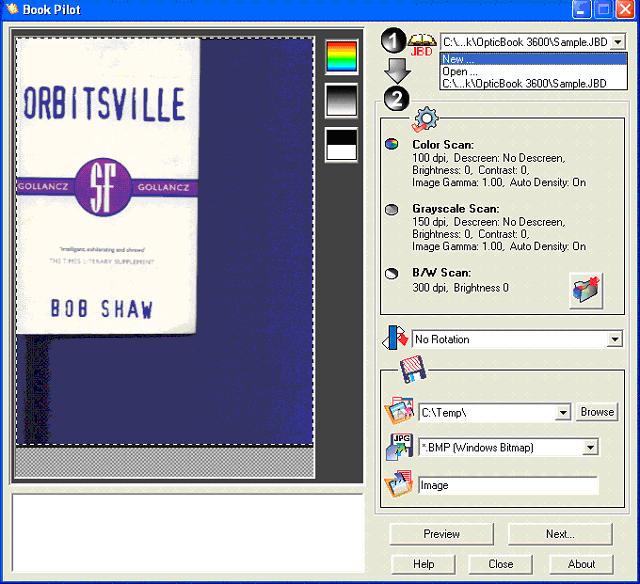
Step 2 is to select the settings. (You dont actually start scanning until step 3.) First off, I selected a new project.
After creating the project file, you then adjust the scan frame. I.e drag the dotted line to cover the actual size of the book.
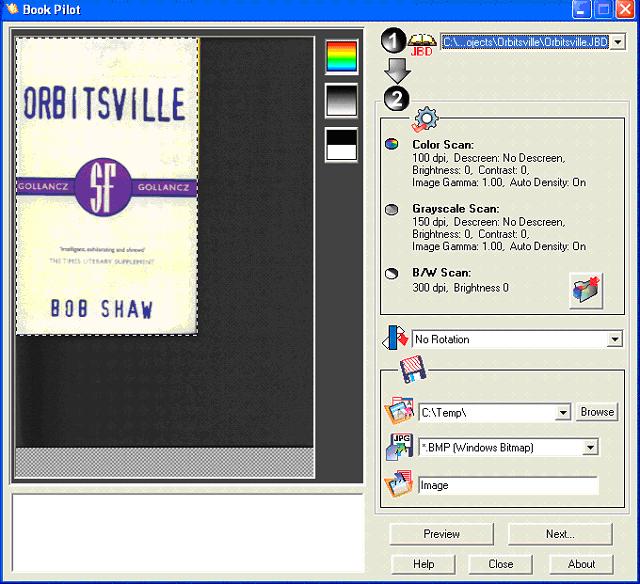
Im a little confused about black and white versus grey scale versus color because I dont want color except for the cover. So Ill rule out color for now. I dont want grey scale either (less resolution), so I want to go with black and white, but the preview looks horrible. Remembering a
comment from MoonRaker, I decided to go with greyscale after all.

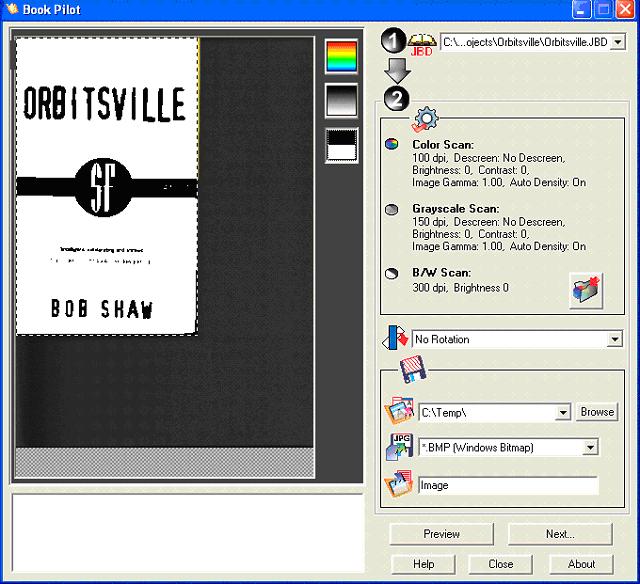
Heres what black and white preview would have looked like:
There are also some advanced settings available (strangely enough you click on the button that looks like a big folder to get to the advanced settings). It did look like I could improve on the image. But not knowing what Im doing yet, I left it at the default grey scale settings.
There is a setting for page rotation, and I chose 180 degree rotation for every even page, figuring that the odd pages would be just like the cover, since I had the binding near the edge.
Last setting before I go to scanning is the destination folder for the scanned images. I created a subfolder from where the project file was stored.
Very oddly, there is no instruction on what image format to use. I left the default BMP thinking that it might be the default for a reason other than due to an alphabetic sort of file types. Also, I thought I remembered it being lossless, whereas JPEG degrades more after being edited. TIF seemed the most logical choice, however, and Moonraker had also mentioned TIF, so I figured I might be sorry about BMP. But thats probably what a typical new user would have chosen, so I went with BMP.
I wasnt sure how the file name prefixes would be used by programs down the line, but a note in the instructions suggested that you use a combination of folder, file format and file name prefix. They gave a reason that I couldnt understand, but I followed obediently and chose Images_BMP_Orbitsville_ for the image name prefix. It turned out to be a good choice.
So heres my settings before I selected Next
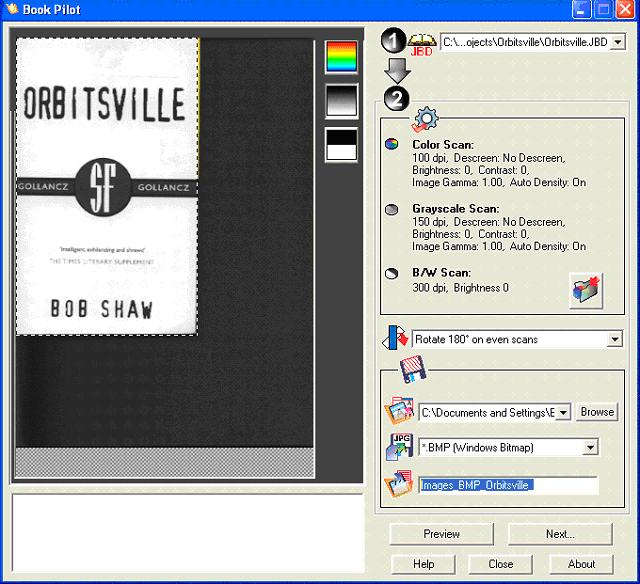
Now that I've got the settings I click on "Next". Oops! That doesnt seem to be what I should have done! Next is meant to be clicked when you finish scanning, in order to do some batch work with the images. Here's what I got by mistake.
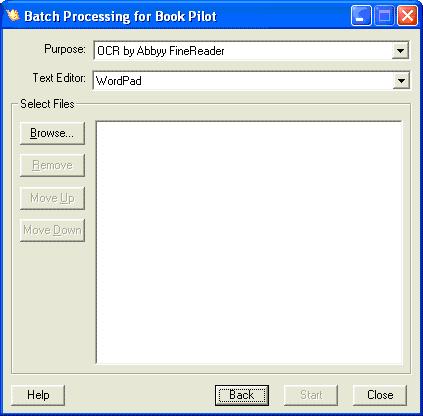
So Ill click on Back and hope it behaves well. Yep, back to the previous screen as desired. Unfortunately, now I need to wait a few seconds for the scanner to warm up again.
To be continued in Part II...
Unfortunately, due to the lateness of the hour and the maximum size limit for posts, we will have to end Part I for now. When I have opportunity, I will continue with Part II and a description of the actual scanning process, as well as turning the scanned images into an e-book. If you are interested in book scanning, you won't want to miss it!
Please pardon any spelling or grammatical errors because my focus is getting this information out, not worrying about spelling. While I may go back and proofread this post in the days to come, for now you get it in its raw form. But if you are curious like me about book scanning, and want to get a feel for what it's like to use the OpticBook scanner to scan a book, this information will be both unique and invaluable, and well worth the wait!
Disclaimer: Depending on your books, your location and your circumstances, local law may or may not allow you to "format shift" your books to electronic format. Each individual is responsible for ensuring that use of a book scanner falls within legal constraints, and I am no legal expert. But most emphatically, we vehemently discourage any form of e-book piracy. Such activities only slow the adoption of commercial e-books and feed the ongoing propaganda machine that implies piracy is the primary justification for invasive DRM technologies. This review is not intended in any way to provide a discussion of copyright law, but the topic should be mentioned, and so now it has been.